jueves, 26 de junio de 2014

Mandazi (buñuelos africanos)/ Mandazi (African donuts)

(English version below)

Hola a tod@s, 
¿Cómo va el comienzo del verano?

Hacía tiempo que estaba pensando en compartir esta receta con vosotr@s; los Mandazi africanos me llaman la atención ya que la elaboración es bastante parecida a las rosquillas que se hacen en España, solo que a los Mandazi se les da una forma triangular normalmente, a parte de añadirles otros ingredientes como el coco o el cardamomo.


El Mandazi, es típico del África oriental, resulta muy fácil de preparar, y se puede comer a cualquier hora acompañado de salsas para mojar o simplemente para merendar acompañado de un buen té.
Se dice que es parecido a un donut, aunque es mucho menos dulce que los donuts occidentales.


Es una receta muy sencilla de preparar, seguro que a los niños les encantan y también a los mayores... aviso: no podréis comer sólo uno!! ;)


Aquí os presento mi versión de los Manzadi, espero que os guste: 

Ingredientes: 
40 gr de azúcar.
450 gr de harina
1 huevo batido
2 cucharaditas de levadura de panadero
1 cucharadita de levadura química
200 ml de leche de coco
2 cucharaditas de mantequilla a temperatura ambiente
canela (al gusto)
cardamomo molido (de 2 a 4 cucharaditas)
Aceite (para freír)

Mezclamos bien todos los ingredientes hasta conseguir una masa homogénea, podemos añadir harina en caso de que sea necesario y hasta que la masa no se nos quede pegada a los dedos y sea suave.


Después tapamos la masa con un paño limpio y la dejamos levar en un lugar cálido durante una hora aproximadamente.


A continuación, cuando veamos que la masa ha duplicado su tamaño, volvemos a amasar y con un rodillo la extendemos en la mesa de trabajo y la vamos cortando en forma de triángulo (también se les puede dar forma redonda tipo buñuelo si lo preferís).


Ponemos el aceite a calentar y freímos los Mandazi hasta que se doren. 


Se pueden espolvorear por encima con coco desecado, azúcar en polvo y canela o también con miel ya que no llevan demasiado azúcar. 


Están deliciosos!!, espero que los probéis en casa y me contéis como os han salido. 


Hasta la próxima, que tengáis buen fin de semana, 
Bea.

----------------------------

(English version here)

Hi everybody!
How is the beginning of the summer going?

I was already looking forward to share this recipe wth you; it´s funny that the african Mandazi and Spanish rolls are made almost the same way but usually Mandazi have a triangular shape.


Mandazi is originally from Eastern Africa, is very easy to prepare, can be eaten with almost any food or dips or just a simple snack with a nice cup of tea. 
Madazi are similar to doughnuts but less sweet, that´s why you can add some honey, sugar or even chocolate when you eat them.


As I said, this is very easy to prepare, I´m sure the kids will like this recipe but also the grown ups...I warn you..you can not eat just one ;)


Here I show you my version of Mandazi, I hope you like it!

Ingredients: 
40 gr sugar
450 gr flower
1 egg
2 tablespoons of yeast
1 tablespoon of baking powder
200 ml coconut milk
2 tablespoons butter
cinnamon
ground cardamom (2-4 tablespoons)
Cooking oil

Mix all the ingredients well until you have a homogeneous mixture, you can add more flour if needed so the dough doesn´t get stuck on your fingers and is smooth.


Cover the dough with a clean cloth and let rise in a warm place for about one hour.


Then, when the dough has doubled in size, knead again and extend it well, and cut it into a triangle (it can also be shaped like little balls if you prefer)


Heat the cooking oil and fry the Mandazi until they get a golden color.


You can sprinkle with coconut, powdered sugar and cinnamon or honey, remember that they don´t have so much sugar.


I hope you try this at home and let me know how it was :) They are delicious!!


Have a nice weekend, 
Cheers, Bea.


<a href="http://www.bloglovin.com/blog/11927323/?claim=kjbxv96wv8d">Follow my blog with Bloglovin</a>


miércoles, 11 de junio de 2014

Barritas energéticas/ Energy bars

(English version below)

Hola a tod@s!
la preparación de las barritas de cereales que hoy os traigo es muy facilita y el resultado muy natural y rico. Con todos los ingredientes que llevan, son perfectas para cargarnos de energía antes de salir a correr, para la práctica de cualquier otro deporte, para recuperarnos después o simplemente como snack saludable a media mañana o tarde. 


Empezamos!!

Ingredientes: 
Un chorrito de aceite de oliva
Una pizca de esencia de vainilla
Una pizca de canela
Semillas de chia
Quinoa
Almendra molida
Copos de Avena (150 gr)
Semillas de sésamo
Compota de manzana
Para endulzar: Sirope de ágave o miel  o azúcar moreno (al gusto)


En esta ocasión para las cantidades me he guiado por la medida de un plato pequeño (como podéis ver en la foto) 

Comenzamos mezclando bien todos los ingredientes, a continuación vamos colocando la mezcla dentro del molde (previamente engrasado con aceite) o bandeja del horno que vayamos a utilizar, apretamos la masa para que se fije bien y la metemos al horno a 180º C durante 20 ó 25 minutos.


Seguidamente lo sacamos del horno y después de haberlas dejado enfriar durante al menos 10 minutos las cortamos.
Ya tenemos nuestras barritas energéticas caseras.


Os recomiendo añadir compota de manzana a la mezcla antes de meterlas al horno, ya que esto ayuda a que no se nos deshagan cuando las cortemos.
Están buenísimas, aunque admiten múltiples posibilidades, se les pueden añadir otro tipo de semillas que os gusten, pepitas de chocolate, uvas pasas, etc.


Nos aportan mucha energía y múltiples beneficios, como por ejemplo: 
*Semillas de chia: proteínas, fibra, calcio, antioxidantes, ácidos grasos omega 3.

*Quinoa: Calcio, fósforo, magnesio, vitaminas C y E entre otras.
* Sésamo: Fibra, vitaminas, minerales.

Espero que lo probéis en casa, seguro que el resultado es riquísimo!. 
Tened muy buen día, Hasta pronto!!!

----------------------------
English version here

Hi all!
I really like today´s recipe, because it´s very easy to make and the results are tasty, natural and healthy. 
The combination of the ingredients make this energy bars perfect to eat before going to practice any sport or help to recover our body after; also they are the perfect snack.


Here we go!!

Ingredients:
Olive oil
A pinch of vanilla
A pinch of cinnamon
Chia seeds
Quinoa
Ground almond
Oatmeal (150 gr)
Sesame seeds
Apple sauce
To sweeten: Agave syrup, honey or brown sugar (as you prefer)


This time I´ve measured the quantities with a small plate (as you can see in the above picture).

We start mixing well all the ingredients, the we place the mixture into the mold or baking sheet; press the dough well, so it won´t get loose.
Place the mixture in the oven 180ºC for about 20-25 minutes.


We take it out of the oven and let the mix coll down for 10 minutes and after that, we can the dough carefully. 
 We already have our own homemade energy bars!!


I recommend you to add the apple sauce to the mix before place them in the oven, since this will help for the bars to not fall apart or break when we cut them.
They are really yummie and you can also add any other seed that you like, chocolate chips or raisins.


By eating one of those we can get energy and many beneficts, for example: 

* Chia seeds: protein, fiber, calcium, antioxidants, omega 3 fatty acids. 
* Quinoa: Calcium, phosphorus, magnesium, vitamins C and E among others. 
* Sesame: fiber, vitamins, minerals. 

I hope you try this at home, the result is really good. 
Hope you have a nice day!
Cheers!!!


<a href="http://www.bloglovin.com/blog/11927323/?claim=kjbxv96wv8d">Follow my blog with Bloglovin</a>

jueves, 5 de junio de 2014

Crumble de Manzana/ Apple Crumble

(English version below)

Hola a todo@s!, 
aunque ya estamos en el mes de Junio, parece que el verano aún duda en instalarse definitivamente. Por eso, para acompañar la tarde de un día realmente lluvioso, qué mejor que ésta sencilla tarta de origen inglés, que además está riquísima consumida tanto caliente como fría. 


Aquí os enseño mi versión del crumble de manzana: 

Ingredientes: 
4 manzanas
Azúcar moreno (yo he utilizado muy poquita azúcar, así que la cantidad es al gusto de cada uno)
60 gr de mantequilla
200 gr de harina
Canela (al gusto)
Miel (dos cucharadas)
Avena (opcional)

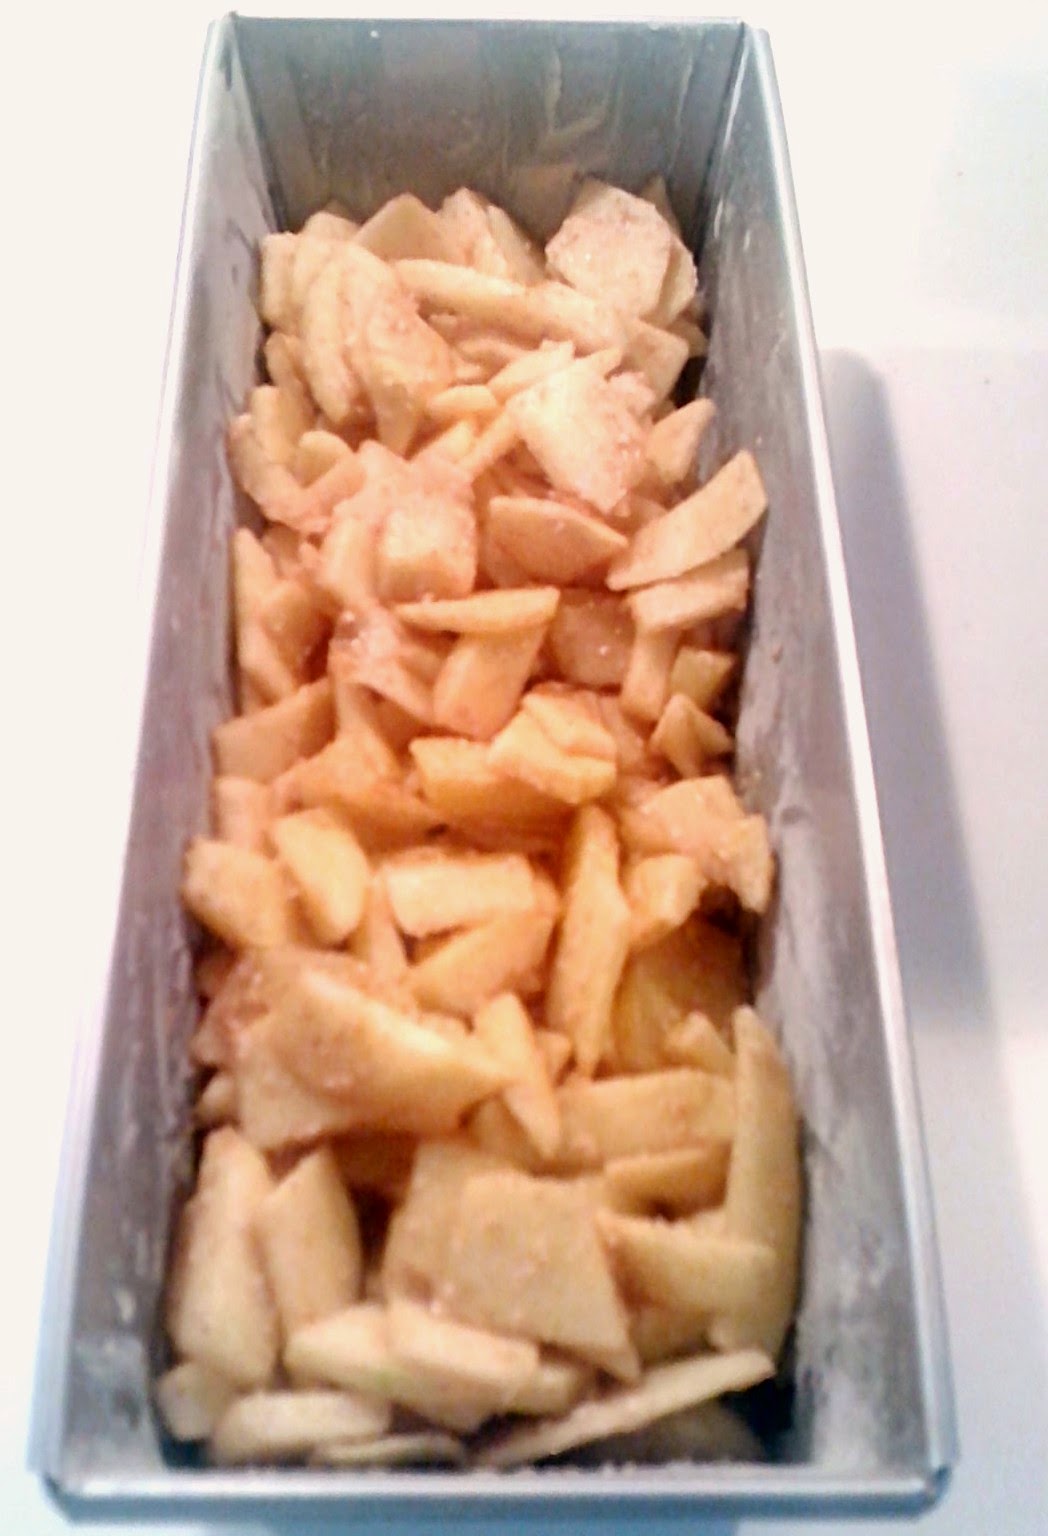
1º) Comenzamos pelando las manzanas y cortándolas en gajos finos. Una vez tenemos la manzana lista, la mezclamos bien con dos cucharadas de azúcar moreno (al gusto), una cucharada de miel, canela y una cucharada de copos de avena.
Ésta mezcla la colocamos en el molde que vamos a meter al horno.


2º) En un bol a parte, ponemos la harina, dos ó tres cucharadas de azúcar moreno, canela y la mantequilla. Para mezclarlo bien todo, utilizamos las manos, así se formarán una especie de migas, que podemos dejar enfriar en el horno durante 10 minutos más o menos.


3º) Tras sacar nuestras 'migas' de la nevera, ya podemos espolvorearlas generosamente por encima de la mezcla de mazana. Lo metemos en el horno durante 40 minutos (más o menos dependiendo del horno) a unos 170º, hasta que la mezcla de crumble se ponga un poco marrón.


Y ya tenemos nuestro crumble de manzana, como ya he comentado se puede servir caliente o frio acompañado de helado de vainilla, he incluso se puede espolvorear un poco más de canela por encima. 


Me encanta la combinación de la canela con manzana,huele genial y sabe mejor todavía!!! Aunque se puede hacer crumble de fresas, frutos rojos, etc.

¿Y cual es vuestra versión del crumble?

-----------------------
English version here

Hi all!, 
Although we  are already in June, the summer wants to make us wait for a while before settling down for good. That´s why I thought that this pie, originally from England, would be the perfect company for a rainy day. 


Here I tell you my particular version for the Crumble Pie: 

Ingredients: 

4 apples
Brown sugar (I didn´t use so much, so you can add what you like)
60 gr butter
200 gr flour
Cinnamon
Honey (2 tbsp)
Oatmeal (optional)

1º) Start peeling the apples and cutting them in small cubes. Then, mix the apple cubes with 2 tbsp of brown sugar, 1 tbsp honey, cinnamon and 1 tbsp of oatmeal. 


2º) In a separate bowl mix the flour, 2 or 3 tbsp brown sugar, cinnamon and butter. We mix all the ingredients, and here is the funny part, we mix it with our hands so we´ll get a crumbly texture. We can let this mix cool down in the fridge for 10 minutes.


3º) After taking our crumble mix out of the fridge, we spread it on top of the apple cubes generously and add some cinnamon. Bake at 170º C during 30-40 minutes, depending on the oven until the crumble is a bit browned.


That´s it!! we have our yummy crumble pie. It can be served warm or cold and it tastes great with vanilla ice cream. 


I really like the combination of apple with cinnamon, smells great and the taste is even better!! You can also bake strawberry or red fruit crumble.

And what about your favourite version of apple crumble? How do you make it at home?

Cheers!!!

<a href="http://www.bloglovin.com/blog/11927323/?claim=kjbxv96wv8d">Follow my blog with Bloglovin</a>


viernes, 23 de mayo de 2014

Galletas de almendra y té verde matcha/ Matcha tea cookies

(English version below)
Hola! 
después de un 'pequeño parón' aquí estoy de vuelta con mi nueva entrada; la verdad es que ya tenía ganas de volver a publicar y sobre todo algo relacionado con éste tipo de té que me encanta (aunque la receta de hoy puede hacerse sin té y seguro que las galletas quedan igual de sabrosas)

Los que me conocen ya saben que soy una super fan del té, sobre todo del rojo y del verde; y hablando del verde, hace como dos años, descubrí el té Matcha, que podría decirse que es el rey de los tés por sus múltiples propiedades. Para resumir y no enrollarme mucho os diré que es un té que viene en polvo ya que se muele después de su secado y entre sus propiedades más conocidas es que posee una gran concentración de antioxidantes (tres veces más alta que otros tés verdes comercializados) además de que estimula el metabolismo, baja la tensión arterial y el colesterol.


Aunque a parte de disfrutar de una buena taza, su uso también se extiende a otras áreas como la de las numerosas recetas que se pueden hacer, como por ejemplo bizcochos, tartas, trufas, cremas, helados y un largo etcétera.
Hoy una receta súper sencilla y perfecta para merendar, empezamos??


Ingredientes:


150 gr de harina
3 cucharaditas de almendra molida
90 gr de mantequilla sin sal (debe de estar a temperatura ambiente)
1 pizca de sal
10 gr de levadura química
50 gr de azúcar (se le puede echar más o menos según el gusto)
2 yemas de huevo
2 cucharaditas de té matcha
1 pizca de esencia de vainilla

1º) Comenzamos tamizando la harina, la levadura química y la almendra en polvo.

2º) A continuación, con un robot de cocina batimos la mantequilla junto con el azúcar hasta que nos quede una mezcla suave, después vamos incorporando las yemas batidas, la vainilla y el té; removemos bien e incorporamos por último la harina mezclado hasta que estén los ingredientes bien integrados.

3º) Con las manos vamos amasando la mezcla y hacemos una bola que envolveremos en papel film y dejaremos reposar en la nevera de 1/2 hora a 1 hora.


4º) A continuación se pone la masa entre dos papeles vegetales y la estiramos.
Con el cortador de galletas elegido vamos dando forma a las galletas y colocandolas en la bandeja del horno (poner papel vegetal debajo si es necesario o añadir harina para facilitar el amasado)


5º) Precalentamos el horno a 175º y metemos las galletas durante 10 minutos (a la mitad del tiempo se le puede dar la vuelta a la bandeja para que se cocinen todas las galletas de igual manera).


6º) Las sacamos del horno y tras dejarlas enfriar ya podemos disfrutar de nuestras galletas.


...Y ya está! ya tenemos nuestras galletas de té matcha, aunque como ya os he dicho anteriormente si no disponéis del té, podéis prescindir de él y hacerlas con el resto de los ingredientes indicados. Las podemos decorar con azúcar en polvo o chocolate, pero a mí personalmente me gusta el color verde que el té les aporta. Están deliciosas!!!


Espero que lo intentéis, hasta pronto!!!

Ah! y por último no quiero olvidarme de felicitar a mi hermana en el día de su cumpleaños, Muchas Felicidades, eres la mejor!

---------------------------------------------
English Version here:

Hi everybody!
here I am with my new post after a big break. Actually I was looking forward to post again and especially something related with this kind of tea that I really like. Today´s recipe can be made without tea and the cookies will be equally good :)


People around me already know that I am a BIG fan of tea, specially red and green.

Talking about green tea, two years ago I discovered the Matcha tea (the king of the teas); I really like it because it has many healthy benefits (three times greater than the normal green tea commercially available). Its a powder green tea with a high concentration of antioxidants, it helps to reduce high blood  pressure and moderate cholesterol.


We can enjoy a nice cup of Matcha but the use of this tea goes to many more areas, for example the amount of recipes that can be made with it like cakes, truffles, creams, ice-creams etc.

Today a super easy recipe, shall we start?


Ingredients: 


150 gr of flour

3 tea spoons of ground almonds
90 gr butter (without salt)
1 pinch of salt
10 gr of yeast
50 gr of sugar
2 egg yolk
2 tea spoons of Matcha tea
1 pinch of vanilla


1º) First we sieve the flour together with the yeast and the almonds.


2º)  After that we mix the butter together with the sugar until we get a smooth mixture, we incorporate the egg yolks, the vanilla and the tea; mix well and finally incorporate the flour and mix until the ingredients are well mixed.

3º) With our hands we knead the mixture. Make a ball, wrap it plastic foil and let it rest in the refrigerator 1/2 hour to 1 hour.


4º) Now, we can stretch the mixture and with the cookie cutter we shape the cookies and place them on the baking tray.


5º) Preheat the oven 175º C and place the cookies during 10 minutes (flip the tray half the time, so all the cookies are cooked the same way)


6º) Let them cool down and get ready to enjoy your matcha cookies :)


And ... that's it! we have our matcha tea cookies, although as I  said before if you don´t have Matcha Tea , you can make the cookies without it. They can be decorated with powdered sugar or chocolate, but I personally prefer the green color that the tea provides them. They are delicious!


I hope you try to make them at home, see you!


Ah! also I would like to congratulate my sister for her birthday: I really hope you can have a relaxed and happy birthday, send you a big kiss from here, you are the best!!! (we will celebrate together when I´m back)


<a href="http://www.bloglovin.com/blog/11927323/?claim=kjbxv96wv8d">Follow my blog with Bloglovin</a>