Hola,
he cambiado mi web, por favor, dirígete a la siguiente dirección para ver más contenido y saber más sobre mi. Gracias.
Hi,
I´ve changed my website, please head to the following address to read more about me and new recipes. Thanks!

Hola,
he cambiado mi web, por favor, dirígete a la siguiente dirección para ver más contenido y saber más sobre mi. Gracias.
Hi,
I´ve changed my website, please head to the following address to read more about me and new recipes. Thanks!
Ésta es una receta un poco invernal, para mi gusto, pero ya que la primavera se nos resiste (por lo menos en el norte) cocinar comida confortable es un buen plan para mi, y para tí?.

Ingredientes:
3 Huevos
1 manzana rallada
1 Cucharada de mantequilla derretida
1 chorro abundante de leche
1/2 cucharadita de levadura en polvo
1 chorro de anís
Esencia de vainilla
Harina, la que admita (tiene que quedar una masa densa, ni muy liquida ni muy espesa.
Aceite de oliva para freír
Azúcar glas para decorar
Procedimiento:
En un cuenco grande mezcla bien la mantequilla derretida, la leche, los huevos, el anís, la esencia de vainilla, añade la manzana rallada y vuelve a remover para integrar todo. Por último añade la harina con la levadura en polvo e integra bien todos los ingredientes.

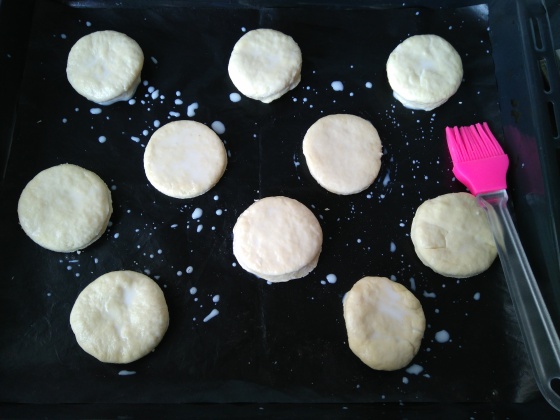
En una sartén honda, pon abundante aceite a calentar y con la ayuda de una cuchara (en este caso funcionan muy bien las cucharas para helado) vierte las porciones de la masa, deja que frían por un lado hasta que comiencen a flotar, entonces dales la vuelta, cuando estén dorados ponlos en un plato con papel absorbente. Sirve con azúcar glas espolvoreada por encima.

Disfruta.
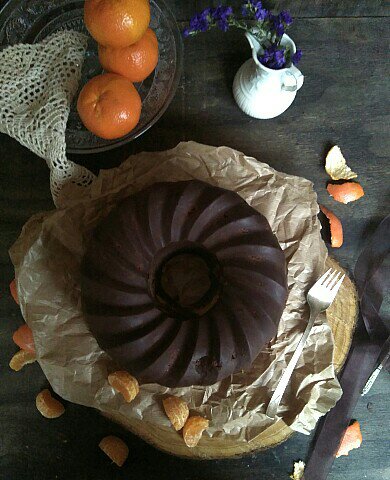
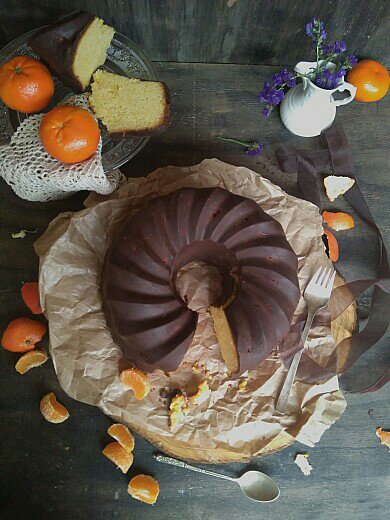
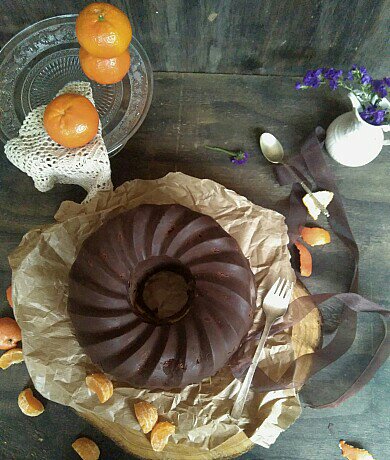
Este es un bizcocho de mandarina que ya de por sí está bien jugoso y es macanudo, pero además lleva el extra de la cobertura de chocolate ‘efecto suave’, como yo la llamo; y es que desde que la vi en una de las recetas de Montes de Manzana y Canela con éste tipo de cobertura, no me la pude sacar de la cabeza de lo maravillosa que me pareció, así que, más pronto que tarde, me puse manos a la obra. Además no es nada difícil, lo único que se necesita es un molde de silicona. He cambiado algunas cosas a mi gusto, yo quería conseguir una cobertura finita para no matar del todo el sabor de la mandarina.
Aquí os dejo la elaboración:
Ingredientes para el bizcocho:
3 huevos
280 gr de azúcar
250 gr de mantequilla a temperatura ambiente
370 gr de harina
1 yogur natural
La ralladura de 3 mandarinas
150 ml de zumo de mandarina
2 cucharaditas y media de polvo de hornear
1 pizca de sal
1 chorrito de esencia de vainilla (opcional)
Primero bate la mantequilla y el azúcar hasta su completa integración, después añade los huevos, uno a uno, y siempre después de haberlos integrado bien. Ahora añade la ralladura de mandarina, el zumo de mandarina y la vainilla.

Por último, incorpora la harina tamizada con la sal y el polvo de hornear, alternándola con el yogur.

Vierte la mezcla en el molde que hayas elegido, que sea de silicona, previamente engrasado y lleva al horno, precalentado a 170°C , durante 1 hora o hasta que compruebes que el bizcocho está listo.
Deja enfriar unos minutos antes de desmoldar, desmolda y deja enfriar completamente el bizcocho.
Ingredientes para la cobertura suave de chocolate:
150 gr de chocolate para fundir
1 cucharada de mantequilla
Procede a derretir el chocolate junto con la mantequilla, cuando lo tengas listo, vierte el chocolate fundido en el molde de silicona que hayas elegido y reparte muy bien por todo el molde con la ayuda de un pincel. A continuación vuelve a meter el bizcocho dentro del molde, encajándolo bien y llevarlo a la nevera por unas dos o tres horas. cuando el chocolate se haya endurecido y adherido bien al bizcocho, pela el molde para sacarlo y verás que saldrá de una pieza y suave.

No es difícil y hace un efecto precioso, espero que lo 😊😘.
(English version below)
Si, si, 3 ingredientes 20 minutos al horno y listo!. No sé si algunos conocíais ésta receta popular, pero bien merece un post. Queda rica, suave, super jugosa y para mí está mucho más rica al día siguiente, pero claro, ¿quién quiere esperar al día siguiente? Y además es muy rápida de hacer, ni qué decir que es facilísima.

Ingredientes: *puedes doblar la cantidad de cada ingrediente para ha erla más grande
3 huevos
300 gr de queso de untar (se podría utilizar queso mascarpone, pero no lo he probado aún)
500 ml de leche condensada
Separa las claras de las yemas. Mezcla en un bol (o en la jarra de una batidora) las yemas, el queso y la leche condensada y mezcla bien con la batidora durante 2 ó 3 minutos.

Bate las claras a punto de nieve en otro recipiente a parte y añádelas poco a poco y con movimientos envolventes a la mezcla de leche condensada y queso.


Cuando esté listo vierte la mezcla en el molde que hayas elegido, que esté engrasado y forrado con papel de horno y lleva al horno (precalentado a 180°C) durante 20/25 minutos. Comprueba con un palillo, y si sale con grumitos y casi seco, está listo. Deja enfriar y listo. Puedes decorar al gusto, aunque al natural está muy bueno.

Fácil, verdad? 😃
English version here
That’s right! 3 ingredients 20 minutes in the oven and ready!. I do not know if some of you knew this popular recipe, but surely, it deserves a post. It is rich, soft, super juicy and for me it tastes much better the next day, but of course, who wants to wait till the next day? And it is very quick to prepare, needless to say, it is very easy.
Ingredients: * you can double the amount of the ingredients to make it bigger.
3 eggs
300 gr of cheese spread (you could use mascarpone cheese, but this I didnt try yet)
500 ml condensed milk
Separate the whites from the yolks. Mix the yolks, cheese and condensed milk in a bowl (or in a jug of a mixer) and mix well with the blender for 2 or 3 minutes.
Beat the whites until stiff in another separate container and add them little by little and slow movements to the mixture of condensed milk and cheese.
When ready pour the mixture into the mold you have chosen, which is greased and lined with baking paper and take it to the oven (preheated to 180 ° C) for 20/25 minutes. Check with a toothpick, and if it comes out with crumbs and almost dry, is ready. Let cool and ready. You can decorate to taste, although just like that is very good.

Easy, right? 😃
(English versión below)
Algunos pueden parecer obvios, pero ayudan mucho a organizarse y no convertir ti cocina y mesa de trabajo en un campo de batalla.
Seguramente me deje muchos consejos fuera, pero aquí describo los 10 que siempre sigo y funcionan. ¿Tienes más trucos o consejos que nunca te fallan? Adelante, comparte conmigo, siempre son bienvenidos.
1. Lee la receta entera antes de empezar. Éste puede ser un paso muy obvio, pero algunos ingredientes pueden necesitar de un par de horas o la noche entera para atemperar , como por ejemplo la mantequilla en algunos casos o los huevos. Evita sorpresas y lee😊.
2. Coloca todos los ingredientes pesados y medidos en la mesa de trabajo así como los utensilios. Te facilitará mucho el trabajo y no tendrás que perder el tiempo buscando la harina, el termómetro o lo que sea que necesites en mitad de la tarea.
3. Al igual que en el punto anterior, ten tus moldes preparados, enharinados y forrados con papel de hornear.

4. Conoce tu horno. Siempre se dice y es verdad, no todos los hornos son iguales. Yo sé que los 180° en mi horno son 170°.
5. Precalienta el horno al menos 10 minutos antes de meter el bizcocho o pastel.
6. Comprueba si el bizcocho o pastel está hecho con un palillo o aguja. Más allá de dejarlo hasta el final, comprueba a mitad de cocción, quizás necesite más o menos tiempo. Fíate de tu ojo.
7. Deja enfriar totalmente el bizcocho antes de cortar. El corte será mucho más limpio y no se romperá.
8. Yo suelo hacer el bizcocho de la tarta la víspera de decorarla. Para mantenerlo fresco y jugoso, lo envuelvo en papel transparente y lo guarda en la nevera. Al día siguiente estará aún más bueno.
9. Limpiar el espacio de trabajo y fregar los utensilios utilizados según vayas terminando. Así no tendrás molestos utensilios sucios cuando, por ejemplo, estés decorando la tarta, tendrás más libertad para trabajar mejor.
10. Para mi hornear es una ciencia, que siempre nos permite experimentar, hay que respetar las cantidades y pasos, pero nunca hay que tenerle miedo.

Si quieres compartir algún consejo, puedes hacerlo abajo en los comentarios, cuantos más mejor.
English version here
Some may seem obvious, but they help a lot to get organized and not turn your kitchen and work place into a battlefield
Surely I leave a lot of advice outside, but here I describe the 10 that I always follow and work for me. Do you have more tips that never fail you? Go ahead, share with me, you are always welcome.
1. Read the entire recipe before you start. This can be a very obvious step, but some ingredients may need a couple of hours or the whole night to be at room temperature, such as butter in some cases or eggs. Avoid surprises and read.
2. Place all the measured ingredients on the work table as well as the tools to use. It will make your job much easier and you will not have to waste your time looking for the flour, the thermometer or whatever you need in the middle of the task.
3. Have your molds prepared, floured and lined with baking paper.
4. Know your oven. It is always said and true, not all ovens are the same. I know that the 180 °C in my oven would mean 170°C.
5. Preheat the oven at least 10 minutes before putting the batter inside.
6. Check if the cake is made with a toothpick. Beyond leaving it until the end, check halfway through cooking, maybe its need more or less time. Trust your eye!
7. Allow the cake to cool completely before cutting. The cut will be much cleaner and will not break.
8. I usually make the cake the previous night before decorating. To keep it fresh and juicy, I wrap it in clear paper and store it in the fridge. The next day it will be even better.
9. Keep clean the workspace and do the dishes as you are finished with them. So you will not have annoying dirty utensils when, for example, you are decorating the cake, you will have more freedom to work better.
10. For me, baking is a science, which always allows us to experiment, we must respect the quantities and steps, but never have to be afraid of it. Practice makes the master, so with the time you would be able to tell by eye if a batter is ready to go to the oven or if the cake is done just by smeling it 😉

If you want to share some of your tips, please, go ahead, you can do it. in the comments below.
(English version below)
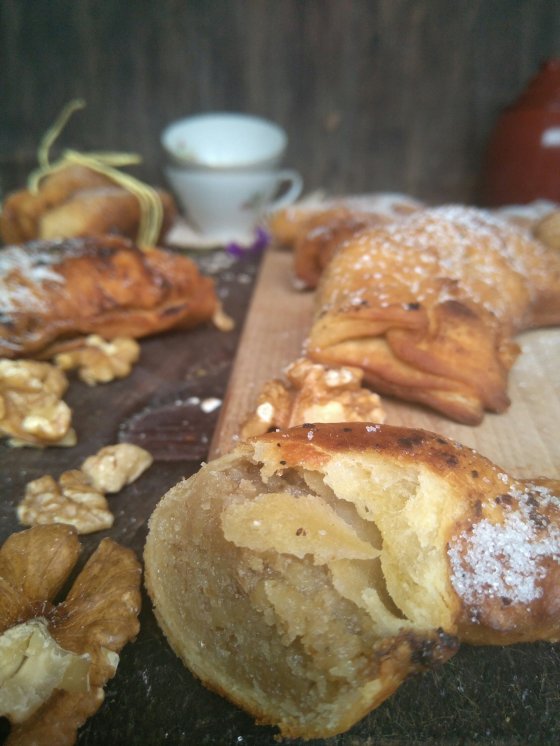
Postre típico asturiano, se trata de una especie de empanadilla frita, con un relleno de nueces picadas, anís y azúcar, aunque a veces se le añaden avellanas.

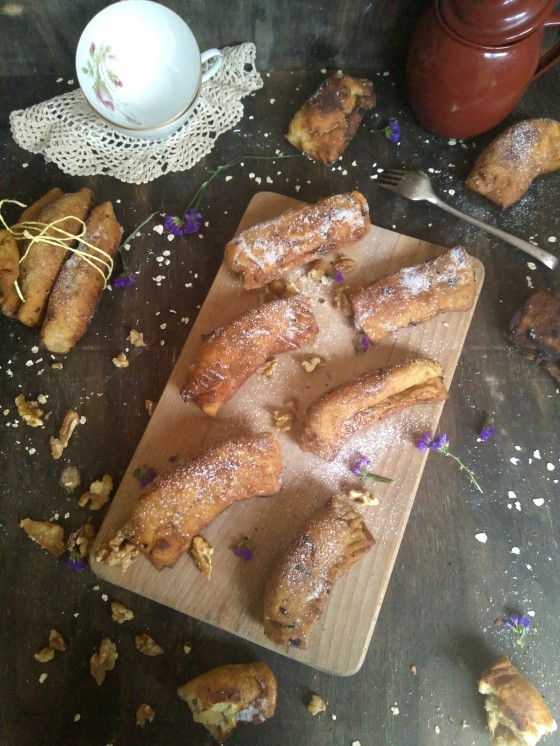
También se pueden hacer cocidas en el horno, en este caso, la masa para envolver sería hojaldre.
Ésta es la receta de las más tradicionales, con bien de relleno y masa fina, como a mi me gustan 😊 .
Ingredientes para la masa
500 gr de harina
Dos cucharaditas de levadura química
1 yema
1 pizca de sal
150 ml de vino blanco
150 ml de aceite de oliva suave
Ingredientes para el relleno
250 gr de nueces peladas y picadas muy finas
Un chorrito de leche
150 gr de azúcar
4 cucharadas de anís
Elaboración:
Preparamos primero la masa. Mezcla en un bol el vino, la yema, el aceite y la pizca de sal, integra bien y añade a continuación la harina junto con la levadura. Mezcla bien con las manos o el robot de cocina hasta que todos los ingredientes se integren y tengas una bola de masa que no se pegue a las manos. Envuelve la bola de masa en papel transparente y deja reposar. Mientras, prepara el relleno👇

Personalmente las nueces me gustan picadas muy finas, así que las triture con un robot de cocina. Mezcla las nueces en un bol con el azúcar, la leche, y el anís y mezcla bien.
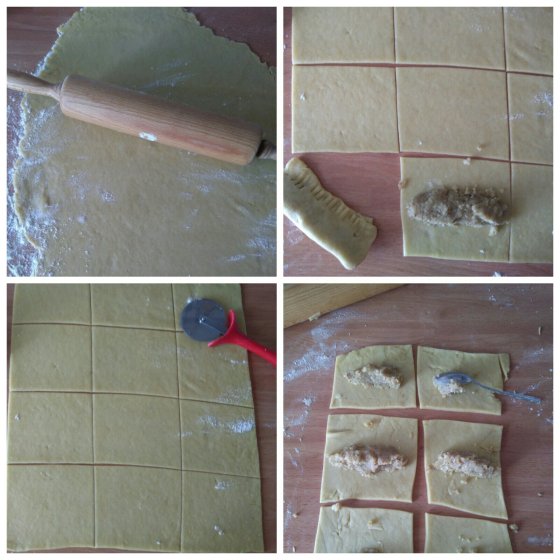
Comenzamos ahora a montar las casadiellas para posteriormente freírlas.
Extiende la masa con la ayuda de un rodillo sobre la mesa de trabajo enharinada, intenta que quede lo más fina posible.
A continuación corta la masa en porciones rectangulares iguales, aproximadamente de 12 x 10 cm.
A continuación coloca a lo largo de cada porción el relleno de nueces, como una cucharadita y media de relleno más o menos; cierra sobre si misma la casadiella y sella los bordes con un tenedor.
Fríe las porciones en una sartén honda con abundante aceite caliente (como para que floten las casadielles) por los dos lados hasta que estén doradas. Coloca las casadielles en un plato con papel de cocina para que absorba el aceite sobrante y a continuación reboza las casadiellas con azúcar.

Te animo a preparar éste postre tan fácil y rico de nuestra tierra.
English version here
Typical Asturian dessert, it is a kind of fried empanadilla, with a filling of chopped nuts, anise and sugar, although sometimes hazelnuts are added.
They can also be cooked in the oven, in this case, puff pastry is used instead of the traditional dough.
This is the most traditional recipe, with a lot of filling anda very thin dough, as I like it 😊.
Ingredients for the dough
500 gr of flour
Two teaspoons of chemical yeast
1 yolk
1 pinch of salt
150 ml white wine
150 ml of soft olive oil
Ingredients for the filling
250 gr of peeled and finely chopped walnuts
A splash of milk
150 gr of sugar
4 spoons of anise
Elaboration:
Prepare the dough first. Mix in a bowl the wine, the yolk, the oil and the pinch of salt, integrate well and then add the flour along with the yeast. Mix well with your hands or the food processor until all the ingredients are integrated and you have a ball of dough that does not stick to your hands. Wrap the ball of dough in transparent paper and let it rest. Meanwhile, prepare the filling👇
Personally I like nuts very finely chopped, so crush them with a food processor. Mix the nuts in a bowl with the sugar, milk, and anise and mix well.
We now start to assemble the casadiellas and then fry them.
Spread the dough with the help of a rolling pin on the floured work table, try to make it as thin as possible.
Then cut the dough into equal rectangular portions, approximately 12 x 10 cm.
Then place along each portion the filling of nuts, about a teaspoon and a half; close the casadiella on itself and seal the edges with a fork.
Fry the portions in a deep pan with plenty of hot oil (so that casadielles float) on both sides until golden brown. Place the casadielles in a dish with kitchen paper so that it absorbs the remaining oil and then coat the casadiellas with sugar.
I encourage you to prepare this easy and delicious dessert of my land.

Enjoy!
(English version below)
Esta es la receta de mi madre, tal y como ella los hace, sin cantidades exactas ni gramos, «a ojo». Como muchas, madres tiene un ojo bien entrenado y saben perfectamente cuando el bizcocho está en su punto o cuando la masa de frixuelos es perfecta.

Aquí dejo la receta tal y como ella los hace.
Ingredientes
Una cucharada de mantequilla
3 huevos
1 pizca de sal
1 pizca de bicarbonato
Agua, la que admita
1 chorro de anís
1 gran chorro de leche, no mucho porque se pueden pegar en la sartén
Harina (200 gr más o menos, dependiendo de los que queramos hacer)
El azúcar, al gusto, se echa al final.
En un tazón, mezcla la mantequilla ligeramente derretida, agregua los huevos, la pizca de sal y bicarbonato, la leche, anís y agua. Mezcla todos los ingredientes bien hasta que estén integrados.
Finalmente agregua la harina y mezcla bien, debe de quedar una masa suave.
Engrasa la sartén con una servilleta empapada en aceite y con la ayuda de un cacillo vierte un poco de la mezcla, no mucho ya que los frixuelos deben de salir finos. El primero siempre (o casi) sale mal, pero puedes comerlo 🙂
Deja que se haga y cuando veas pequeñas burbujas en el centro dale la vuelta al frixuelo y vete colocándolo en un plato llano y echando el azúcar, al gusto.
* mi madre los hace con dos sartenes.
Que los disfrutes !!!
English version here
This is my mother’s recipe, just as she makes them, without exact amounts or grams, just ‘by eye’. As many mothers have a well-trained eye, she knows perfectly when the cake is at its point or when the mass of the crepes is perfect.
Here I leave the recipe as she makes them.
Ingredients:
A spoonful of butter
3 eggs
1 pinch of salt
1 pinch of baking soda
Water
1 jet of anise
1 large stream of milk, not much because they can stick in the pan
Flour (200 gr more or less, depending on how many crespes we want to make)
Sugar, to taste, sprinkle it at the end over them.
Directions:
In a bowl, mix the slightly melted butter, add the eggs, the pinch of salt and baking soda, milk, anise and water. Mix everything well until it is well integrated.
Finally add the flour and mix well, there must be a soft dough.
Spread the skillet with a napkin soaked in oil and with the help of a big spoon pour a little of the mixture, not so much, so they will come out thin. DOn´t stir it, just wait and turn it around carefully when you start to see some bubles in the middle of the crepe.
* my mother makes them with two pans at the same time.
Hope you enjoy them !!!
(English version below)
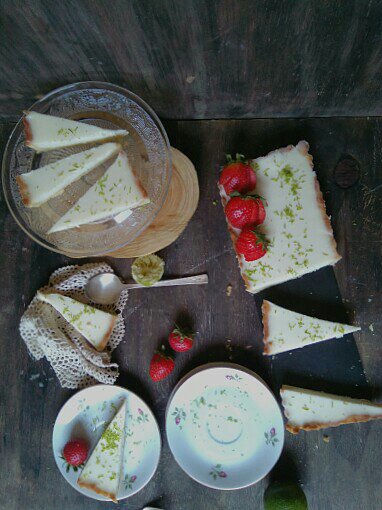
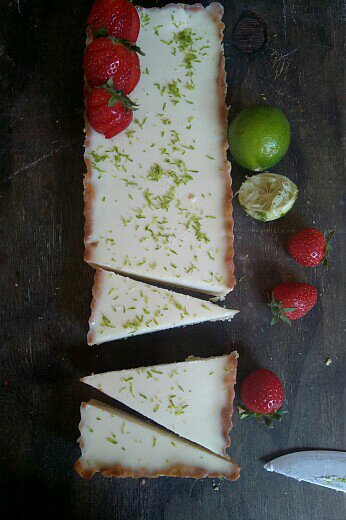
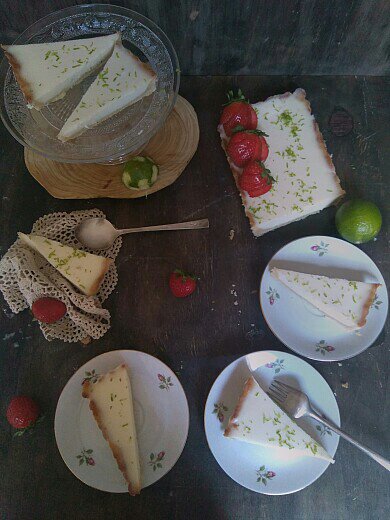
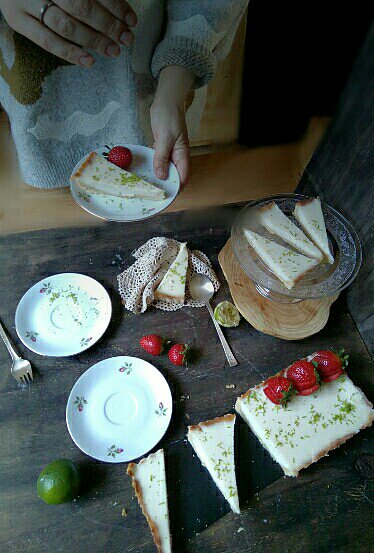
Mascarpone y lima; después de pensármelo unos segundos me puse manos a la obra, quería una tarta ligera y fresca, diferente y especial, aquí está. El resultado es una tarta de queso mascarpone, lima y coco, con base de almendra. ¿El sabor? pues eso, especial, ojalá me quedase un trozo ahora 🙂
La receta como sigue:
Ingredientes para la base:
Es un poco delicada de manejar, pero con cuidado no tiene mayor problema:
140 gr de harina
50 gr de almendra molida
100 gr de azúcar
1 huevo
100 gr de mantequilla

Corta la mantequilla, que debe de estar fría, en pequeños taquitos. Hacer un volcán con la harina y añadir todos los ingredientes, mezclar hasta que esté todo bien integrado. Yo lo he mezclado con un robot de cocina, que es más rápido, pero con las manos sale igual de bien. Amasa bien la mezcla y haz una bola con ella, envuelve en papel film y métela en la nevera durante 10 minutos. Estira la masa con la ayuda de un rodillo en ponla con cuidado encima del molde previamente engrasado. Pon algo encima, como unos garbanzos o bolitas de cerámica para que la masa no suba demasiado y lleva al horno durante 10/15 minutos a 180 ºC. Sácalo y deja enfriar mientras preparas el relleno.

Ingredientes para el relleno:
200 gr de leche de coco
300 gr de nata liquida para montar
El zumo de una lima
La ralladura de una lima
250 gr de que mascarpone
50 gr de azúcar
7 hojas de gelatina
Primero, en un bol con bastante agua, pon la gelatina para que se hidrate.
Mientras, en un cazo pon la nata, la leche de coco, el azúcar, el zumo y la ralladura de lima, y el queso mascarpone, llévalo al fuego, sin que llegue a hervir, remueve de vez en cuando hasta que todos los ingredientes estén bien integrados. Retira del fuego y añade la gelatina bien escurrida. Remueve hasta que se deshaga y vierte el contenido de la mezcla en el molde donde tienes la base. Lleva la tarta a la nevera, por lo menos 5 horas, lo ideal es dejarla toda la noche hasta que se solidifique. Decora al gusto, toma un trozo, disfruta😊.

English version here
Mascarpone and lime; After thinking about it for a few seconds I got down to work, I wanted a light and fresh cake, different and special aand…here it is. The result is a mascarpone, lime and coconut cake, with an almond base. Right, special, I wish I had a piece left now 🙂

The recipe as follows:
Ingredients for the crust:
It is a bit delicate to handle, but if you do it carefully, it will be fine:
140 gr of flour
50 gr ground almonds
100 gr of sugar
1 egg
100 grams of butter
Cut the butter, wich must be cold, into a small cubes. Make a volcano with the flour and add all the ingredients, mix until everything is well integrated. I mixed it with a kitchen robot, which is faster. Knead the mixture well, bit not for so long, and make a ball with it, wrap in foil and put it in the fridge for 10 minutes. Stretch the dough with the help of a rolling pin and carefully place it on top of the previously greased mold. Put something on top, such as some chickpeas or ceramic balls so that the dough does not rise too much and take it to the oven for 10/15 minutes at 180 ºC. Take it out and let it cool while you prepare the filling.


Ingredients for the coconut and lime cream:
200 gr of coconut milk
300 gr of cream
The juice of a lime
The zest of a lime
250 gr of mascarpone cheese
50 gr of sugar
7 sheets of gelatin
First, in a bowl with enough water, put the gelatin so it will hydrate.

Meanwhile, in a saucepan put the cream, coconut milk, sugar, juice and lime zest, and mascarpone cheese, take it to the fire, without boiling, stir from time to time until all the ingredients are well integrated Remove from heat and add the gelatin. Stir until you get a smooth cream and pour the content of the mixture into the mold. Take the cake to the refrigerator, at least 5 hours, ideally leave it overnight until it solidifies. Decorate to taste, take a piece, enjoy it.

(English version below)
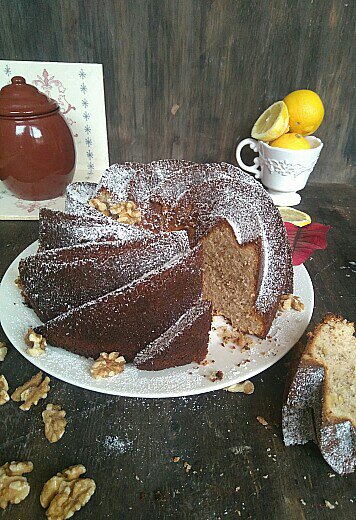
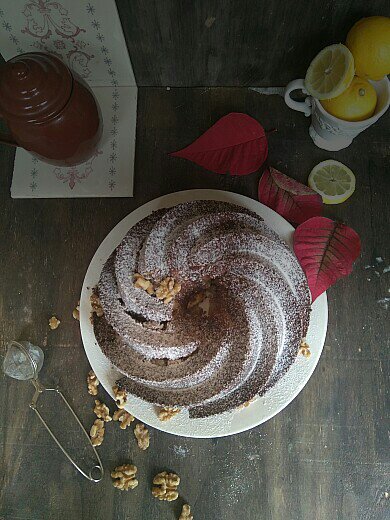
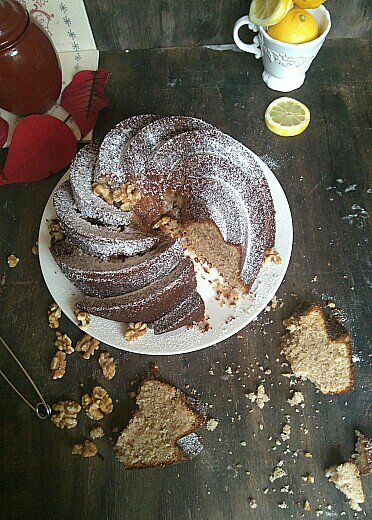
Antes de probar a hacer este bizcocho nunca habría imaginado que el limón y las nueces hiciesen una combinación tan perfecta y suave, pero así es, ha quedado un bizcocho tan jugoso que acaba de entrar en la lista de las recetas que más hago.

Os presento la receta, por supuesto, se puede hacer en cualquier molde para bizcocho.
Ingredientes:
4 huevos
300 gr de azúcar
1 sobre de levadura en polvo
1 pizca de sal
La ralladura de dos limones
El zumo de un limón y medio
1 chorrito de extracto de vainilla
150 gr de nueces picadas bien finas (yo las he picado con un robot de cocina)
300 ml de leche
200 gr de mantequilla
Elaboración:
En un cuenco, bate los huevos con un robot de cocina o batidora manual hasta que tengan un color pálido, a continuación añade el azúcar poco a poco y sigue batiendo hasta que resulte un crema espumosa.

Añade la esencia de vainilla, la ralladura de limón y el zumo de limón.
Añade ahora la harina tamizada junto con la levadura y la pizca de sal, y las nueces picadas, mezcla a velocidad baja.
A continuación calienta la leche, sin que llegue al punto de ebullición y añade la mantequilla, remueve hasta que se derrita.
Incorpora al resto de ingredientes lentamente y bate hasta que todo esté bien integrado.
Vierte la mezcla en el molde previamente engrasado y lleva al horno, que deberá de estar precalentado a 180°C, durante 30 minutos o hasta que al pinchar con el palillo éste salga casi limpio, con algunos grumitos.
Es muy suave y jugoso y sirve también con base para tartas.
Riquísimo

English version here
Before making this cake I would never have imagined that lemon and walnuts would make such a perfect and smooth combination, but that’s right, this is such a juicy sponge cake that has just entered the list of recipes that I do the most.

Here I explain the recipe, of course, can be made in any mold for sponge cake.
Ingredients:
4 eggs
300 gr of sugar
15 gr of baking powder
1 pinch of salt
The zest of two lemons
The juice of a lemon and a half
1 trickle of vanilla extract
150 gr of fine chopped nuts (I chopped them with a food processor)
300 ml of milk
200 gr of butter
Elaboration:
In a bowl, beat the eggs with a kitchen robot or hand mixer until they are pale, then, slowly add the sugar and continue beating until you get a frothy cream.


Add the vanilla extract, the lemon zest and the lemon juice.
Now add the sifted flour together with the yeast, the pinch of salt, and the chopped nuts, mix at low speed.
Heat the milk in a separate bowl without reaching the boiling point and add the butter, stir until melted, add to the rest of the ingredients slowly and beat until everything is well integrated.
Pour the mixture into the previously greased mold and take it to the oven, which must be preheated to 180 ° C, for 30 minutes or until the stick comes out almost clean.
It is very soft and juicy cake very delicious, very nice. Enjoy!

(English version below)
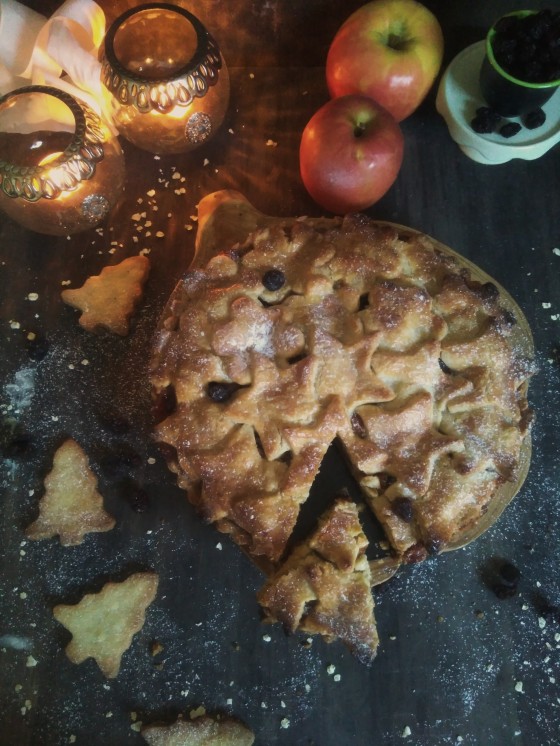
Hace poco mi madre encontró en su casa ésta receta que una amiga me había escrito hace unos años. ¡Qué ilusión volver a ver su letra! al momento pensé que sería una buena receta navideña, aquí va tal y como ella me la enseñó:
Ingredientes:
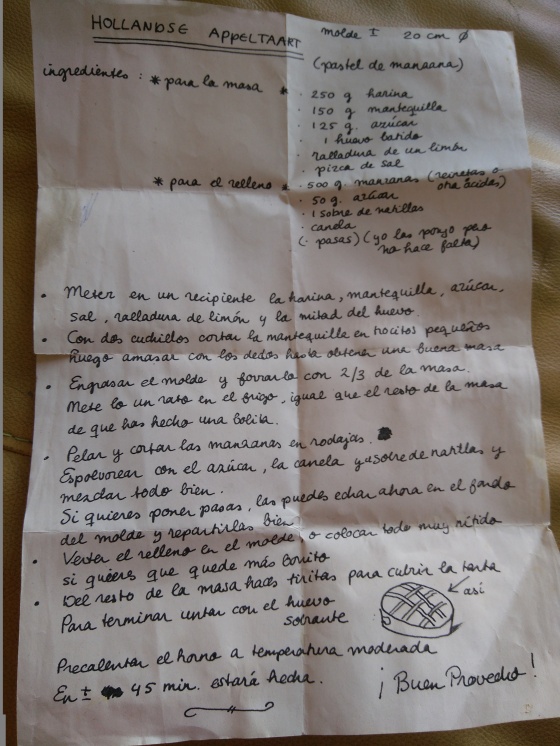
Receta de Jantien💕
Para la masa:
250 gr de harina
150 gr de mantequilla
125 gr de azúcar
1 huevo batido
ralladura de un limón
pizca de sal
Para el relleno:
500 gr de manzanas reinetas
50 gr de azúcar
1 sobre de natillas
canela molida
uvas pasas
Instrucciones:
Meter en un recipiente la harina, la mantequilla, azúcar, sal, ralladura de limón y la mitad del huevo. Con dos cuchillos cortar la mantequilla en trocitos pequeños, luego amasar con los dedos hasta obtener una buena masa.

Engrasa el molde (de unos 20 cm) y forrarlo con 2/3 de la masa, mételo un rato en el frigo, al igual que el resto de la masa de la que habrás hecho una bolita.
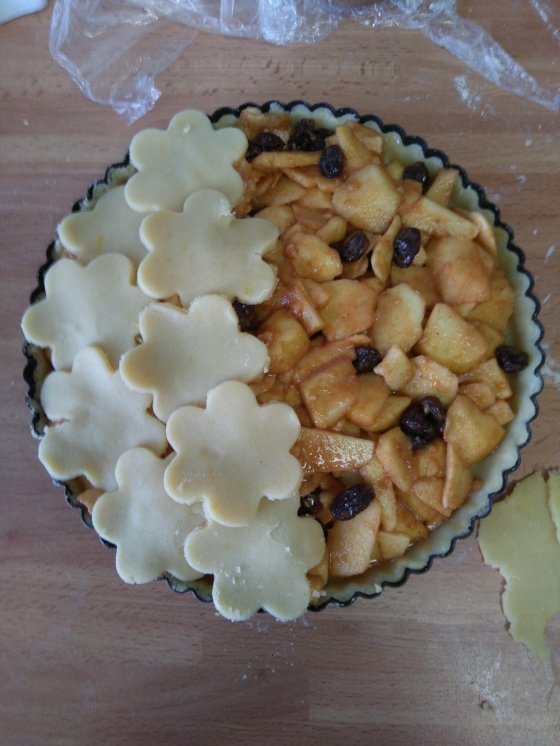
Pela y corta las manzanas en rodajas finas, espolvorea con el azúcar, la canela, el sobre de natillas y mezcla todo bien, añade también las pasas.
Vierte el relleno en el molde y reparte bien hasta que cubra toda la superficie, con el resto de la masa se hace la decoración. Se pueden hacer tiras en forma de rejilla, como la clásica tarta de manzana, en éste caso, para darle un toque más festivo yo he optado por darle forma a la masa con cortadores de galletas y colocarlo de forma bonita por encima.

Para terminar pintar con el huevo sobrante. Llevar al horno a 180ºC durante unos 45 minutos. Servido con helado de vainilla es un plus 😉
¡Buen provecho!

Felices Fiestas
English version here
My mother recently found this recipe that a friend had written for me a few years ago. So nice to see her recipe again! at the time I thought it would be a good Christmas recipe, here goes just as she taught me:
Ingredients:
For the dough:
250 gr of flour
150 gr of butter
125 gr of sugar
1 beaten egg
lemon zest
pinch of salt
For the filling:
500 gr of reinetas apples
50 gr of sugar
1 envelope of custard
ground cinnamon
raisins
Instructions:
In a bowl put the flour, the butter, sugar, salt, grated lemon and half of the egg together. With two knives cut the butter into small pieces, then knead with your fingers until you get a good dough.
Grease the mold (20 cm) and line it with 2/3 of the dough, put it in the fridge for 30 minutes, like the rest of the dough.
Peel and cut the apples into thin slices, sprinkle with the sugar, cinnamon, the envelope of custard and mix everything well, also add the raisins.
Pour the filling into the mold and distribute well until it covers the entire surface, with the rest of the dough make the decoration. You can make strips in the form of grid, like the classic apple pie, in this case, to give a more festive touch I have chosen to shape the dough with cookie cutters and place it beautifully on top.
To finish, paint with the leftover egg. Take to the oven at 180ºC for about 45 minutes. Served with vanilla ice cream takes it to another level.
Bon Appetite!
Happy Holidays!
